Napa Cabbage & Quinoa Salad

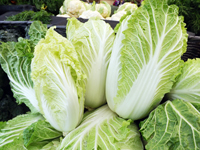
Napa cabbage

Napa cabbage is excellent for salads because of its crisp, lacy texture.

1 cup fresh basil
1/2 cup walnut pieces
1/2 lemon, juiced
1 tablespoon apple cider vinegar
1 tablespoon raw honey
1/2 cup extra-virgin olive oil
1 head Napa cabbage
1 cup spinach, roughly chopped
1 carrot, grated
1-1/2 cup quinoa, cooked and cooled

In a blender, mix basil, walnuts, lemon juice, vinegar, honey and oil until smooth. In a separate bowl, combine cabbage, spinach, carrot, and quinoa. Pour dressing into salad mix and toss until evenly distributed.

We thank Chef Annie McHale of Port Angeles for this recipe.

Have you tried this recipe? Tell us how it turned out!

Glazed Carrots and Brussels Sprouts Sauté

table carrots in bulk

It’s easy and delicious to make food choices depending on what is being harvested now. Eating seasonally means you get the freshest produce with the smallest impact on the environment. Try this carrot-and-Brussels saute and taste how sweet these carrots get!

1 pound carrots, cut into 1-inch pieces
1 pound cleaned Brussels sprouts
3/4 cup chicken or veggie broth
3 tablespoons butter
1/4 cup brown sugar
1 teaspoon apple cider vinegar
1/4 teaspoon salt
1 teaspoon ground black pepper

Blanch carrots in salted water for about 4 minutes. Remove and cool. Blanch sprouts for about 5 minutes. Drain and hold separately. Refrigerate if making ahead.

Bring stock, butter, brown sugar, vinegar and salt to a boil and stir until sugar dissolves and mixture is reduced to about half. Add carrots and shake pan to coat them. Cook for about 6 minutes. Add the sprouts and pepper and cook 4 minutes more, stirring or shaking until all is coated thoroughly. Serve immediately.

Have you tried this recipe? Tell us how it turned out!
Health Benefits of Carrots

table carrots in bulk

Eating carrots on a regular basis has many health benefits. Here are some of them:

Improved vision
Carrots are rich in beta-carotene, which is converted into vitamin A in the liver. Vitamin A is transformed in the retina, to rhodopsin, a purple pigment necessary for night vision. Beta-carotene has also been shown to protect against macular degeneration and senile cataracts.

Cancer prevention
Studies have shown carrots reduce the risk of lung cancer, breast cancer and colon cancer. Falcarinol found in carrots is a natural pesticide produced by the carrot that protects its roots from fungal diseases. Carrots are one of the only common sources of this compound. Studies show that this nutrient helps fight cancer.

Slower aging process
The high level of beta-carotene also acts as an antioxidant to cell damage done to the body through regular metabolism, and helps slow down the aging of cells.

Healthier skin
Vitamin A and antioxidants protect the skin from sun damage and prevent premature wrinkling, acne, dry skin, pigmentation, blemishes, and uneven skin tone.

Immune system support
Carrots are known by herbalists to prevent infection. They can even be used on cuts – shredded raw or boiled and mashed.

Heart health
Studies show that diets high in carotenoids are associated with a lower risk of heart disease. The regular consumption of carrots also reduces cholesterol levels because the soluble fibers in carrots bind with bile acids.

Cleansing
Vitamin A assists the liver in flushing out the toxins from the body and reduces the bile and fat in the liver. The fibers present in carrots help clean out the colon and hasten waste movement.

Tooth and gum care
Carrots clean your teeth and mouth. They scrape off plaque and food particles just like toothbrushes or toothpaste. Carrots stimulate gums and trigger a lot of saliva, which being alkaline, balances out the acid-forming, cavity-forming bacteria. The minerals in carrots prevent tooth damage.

Stroke prevention
People who eat more than six carrots a week are less likely to suffer a stroke than those who ate only one carrot a month or less.

Have you tried this recipe? Tell us how it turned out!

Immune Defense Decoction

This decoction works wonders if you’re feeling rundown, groggy and have low energy, and is a great to drink in copious amounts if you feel a cold coming on. Measurements are flexible, so play with it!

1 quart filtered water (avoid tap water due to fluoride)
3 cloves garlic, slivered
1 dried cayenne pepper (1 teaspoon powder will suffice)
3 tablespoons chopped ginger
1 heaping spoonful honey
1 whole lemon, rind and pith cut off

Put all ingredients in a pot except honey and lemon. Bring to a boil, but immediately turn down to simmer for 20 minutes. Add lemon and simmer another 5 minutes. Strain liquid, add honey and enjoy.

We thank Kellie Henwood for this recipe.

Have you tried this recipe? Tell us how it turned out!

Creamy Garlic Salad Dressing

2 bunches baby turnips, roasted and cooled
1/2 cup of olive oil
1 bunch garlic scapes, chopped
1 teaspoon maple syrup or honey
Salt and freshly ground pepper
1/4 cup sunflower seeds (optional)

Blend roasted turnips with olive oil. Slowly add garlic scapes, maple syrup or honey  salt and freshly ground pepper and sunflower seeds, if desired.

We thank Karolina’s Kitchen at Nash’s Organic Produce for this recipe.

Have you tried this recipe? Tell us how it turned out!
Garlic Salad Dressing

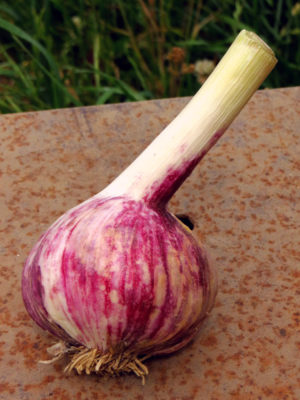
Garlic bulb with rustic background

The raw garlic in this dressing gives you tons of health benefits — not to mention a tasty flavor!

Makes 3/4 cup

1 teaspoon Dijon mustard, smooth or grainy
2 tablespoons plus 1 teaspoon raw wine vinegar
1/2 cup extra-virgin olive oil
1 tablespoon expeller-pressed flax oil
1 clove garlic

Dip a fork into the jar of mustard and transfer about 1 tsp to a small bowl. Add vinegar and mix around. Add olive oil in a thin stream, stirring all the while with the fork, until oil is well mixed or emulsified. Add flax oil and use immediately. Peel garlic clove and mash into a garlic press or fine grater. Stir into dressing. Let site a few minutes to allow amalgamation of garlic flavor.

We thank Sally Fallon’s Nourishing Traditions for this recipe.

Have you tried this recipe? Tell us how it turned out!
Garlic Poultice

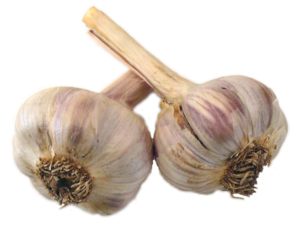
Two Garlic Bulbs

A poultice is just a fancy word for any moist application put on the skin for healing purposes.

To make a garlic poultice, simply put either crushed raw garlic or garlic powder directly over the body part you wish to use a poultice on. Cover with a clean cloth or bandage. You can also warm the poultice with a hot water bottle to help it penetrate more.

On sensitive skin (such as the face, or on a young child or baby’s skin) use a light coating of oil or cream underneath, like coconut oil or a natural lotion. When garlic goes on the skin, it is absorbed and enters the blood and lymph system (this is how it is able to work and heal!), and you may actually begin to taste it in your mouth! This is just fine, but you might want to chew or sip on something to mask the flavor (mint, parsley, etc.).

Have you tried this recipe? Tell us how it turned out!
How to Sprout Whole Wheat Berries

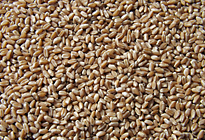
Hard Red Wheat Berries

Sprouted wheat berries have a surprisingly high nutrient value. And they’re easy to make!

Place 1/4 cup wheat berries in a quart canning jar and fill with lukewarm water.

Place a double thickness of cheesecloth over the mouth and secure the jar with ring or rubber band.

Drain water through cheesecloth, fill again & let soak for 2 hours.

Drain, rinse again and drain.

Place jar on its side in a dark place.

Rinse and drain twice a day for 2-4 days, or until 2 cups of sprouts are formed. Place the sprouts in a colander, rinse with cold water, drain and store in a plastic bag in the fridge. Enjoy!

Have you tried this recipe? Tell us how it turned out!

Roasted Heritage Turkey

Cartoon turkey

Have you experienced the flavor and texture of a pasture-raised heritage turkey yet? Let us know if you have a favorite breed in the comments below!

About Heritage Turkeys
Before supermarkets and distributors made the Broad-Breasted White turkey the dominant bird on the market and the turkey most Americans are familiar with, diverse breeds such as the Narragansetts and Jersey Buffs offered families a turkey with greater flavor and texture. Now such turkeys, known as heritage breeds or “standard” turkeys, are making a move to be on your table this Thanksgiving.

Prized for their rich flavor and beautiful plumage, heritage turkeys are the ancestors of the common Broad-Breasted White industrial breed of turkey that comprises 99.99% of the supermarket turkeys sold today. But the heritage breeds still exist and are making a comeback. Most breeds of heritage turkey were developed in the United States and Europe over hundreds of years, and were identified in the American Poultry Association’s turkey Standard of Perfection of 1874. These breeds include the Standard Bronze, Bourbon Red, Jersey Buff, Slate, Black Spanish, Narragansett and White Holland.
With rich-tasting meat that is more moist and flavorful than the mass produced large-breasted turkeys of today, heritage breeds owe their taste to diverse diets and extended life-spans. Dining on fresh grass and insects, these birds exercise and even help control farmers’ pest problems. And while large corporations, which value high breast meat production in a short period, have dominated turkey production and breeding since the 1960s, heritage breeds have been quietly gaining a renewed respect and increased market share due to their flavor and superior biological diversity.

Raising heritage breeds is more costly and time consuming than raising White-Breasted Toms. While supermarket turkeys grow to an average of 32 pounds over 18 weeks, Heritage birds take anywhere from 24-30 weeks to reach their market weight. But those who have tasted Heritage Breeds say the cost, and the wait, are well worth it.
The two breeds that have been raised at Nash’s Organic Produce are and Bourbon Red, with Narragansett making up most of the flock.

Roasted Heritage Turkey
Because your heritage turkey was raised the old-fashioned way—with plenty of grass, insects and sunshine—it needs to be cooked quite differently than the modern, factory-farmed counterpart. This tried and true recipe will make the best of your heritage bird this year.

7-9 pound fresh heritage turkey at room temperature
Kosher or sea salt & fresh ground pepper
3 cups giblet broth (see below)
Rosemary maple butter (see recipe below)
Oiled parchment paper (found at kitchen stores)

Rub turkey inside and out with salt and pepper.

Loosen the skin around the breast with your fingers and insert rosemary maple butter between the meat and the skin as well as on the inside of the bird’s cavity.

Set bird in deep roasting pan. Use a wire rack to lift the bird off the bottom of the pan.

Add the giblet broth to the bottom of the pan. Using a sheet of oiled parchment paper, tent the roasting pan with the oiled parchment paper. Any type of cooking oil can be used. Brush it on both sides with a pastry brush. The parchment paper is easily affixed to the roasting pan with a strip of foil on each end or you can use clean, oiled wooden clothespins. Remove parchment paper and the last 30 minutes of cooking to develop a crispy, golden skin.

Preheat oven to 425-450 F. Roast the bird until the thigh temperature reaches 140-150 F. Let the bird rest 10-15 minutes before carving to let the juices settle.

A word about basting
Quick roasting at high temperatures means the oven temperature needs to be maintained and frequent basting defeats that purpose. By adding butter under the skin, the bird is self-basted. Baste the bird when you remove the parchment tent. If there is not enough liquid for basting, add either more water or wine.

Giblet Broth
2 cups white wine (a deep, oaky chardonnay lends a wonderful taste)
2 cups water
Giblets & neck
Bay leaf

Simmer everything in a small saucepan for 15 minutes. Discard bay leaf and neck. Giblets can be discarded if they aren’t your type of thing or they can be finely chopped and added to the broth.

Rosemary Maple Butter
1/2 pound butter
1/2 cup pure maple syrup
1 tablespoon fresh minced rosemary
Bring butter to room temperature and whip all ingredients together.

We thank Sandra Kay Miller for this recipe.

Have you tried this recipe? Tell us how it turned out!
Easy Street Beets

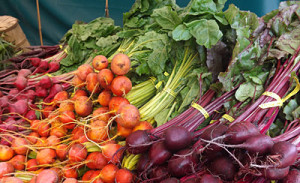
golden beets, chioggia beets, and red beets bunched with greens

Beets can’t be easier than Easy Street Beets.

Remove beets from greens, leaving 1″ of stems. Wash beets under cool running water, then steam until easily pierced with a fork (20-35 minutes, depending on size). Rinse under cool water once done, and slip off skins. While the roots are steaming, wash the greens and saute them with a little olive oil until stems are tender. Slice beets and toss with balsamic vinaigrette and crumbled feta, and serve over warm beet greens.

Have you tried this recipe? Tell us how it turned out!