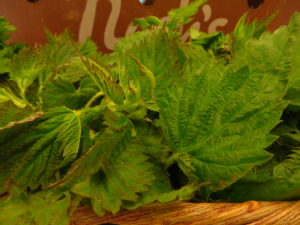
Nettle Pesto

Nettles

Nettles don’t sting once cooked. Magically, steaming or boiling them makes them tame — and delicious!

You will need two or three big tong-fulls of fresh nettles for this recipe. We say tong-fulls because you do not want to pick up fresh nettles, as they will sting you. Get a huge pot of water boiling and add a handful of salt.

Grab the nettles with tongs and put them into the boiling water. Stir around and boil for 1-2 minutes.

Fish them out with a skimmer or the tongs and immediately dump them into a big bowl with ice water in it. Once they are cool, put them in a colander to strain.

Get a cloth towel, like a tea towel, and put the nettles in it. Wrap one end of the towel one way, then the other end of the towel the other and squeeze out as much moisture as you can.

This makes a little more than 1/2 cup of very green, very pretty pesto. Store any unused pesto in the fridge, topped with some olive oil to keep the air out.

To Make Nettle Pesto
3 garlic cloves
2 tablespoons toasted walnuts, pecans, or other nuts
2 tablespoons grated cheese (any hard cheese will do)
6-8 tablespoons blanched, chopped nettles
Salt
Olive oil (use the good stuff)

Pesto is best made with a mortar and pestle, thus the name, which means “pound.” You can also make it in a food processor. First add the nuts and crush lightly. Roughly chop the garlic and add it processor and pulse to blend.

Add the salt, cheese and the nettles and blend together until it is all fairly uniform.

Start adding olive oil. The amount depends on how you are using your pesto. If you are making a spread, use maybe 2 tablespoons. If a pasta sauce, double that or more. Either way, add 1 tablespoon at a time, stirring to incorporate it.

Serve as a spread on bread, as an additive to a minestrone as a pasta sauce or as a dollop on fish or poultry. You can freeze it and in the fall, put it on baked delicata squash. Fantastico!

Have you tried this recipe? Tell us how it turned out!

Nettle Shiitake Quiche

Nettles

Nettles are so full of nutrients, plus they’re super-tasty with mushrooms and potatoes in this quiche.

Serves 8-12

2 baked pie shells
1 pint shiitake mushrooms
6 cups nettle tops
1 large russet or 2 medium Yukon gold potatoes
1 onion, chopped
4 tablespoons olive oil
2 cups milk
3 eggs
3/4 cup goat cheese
1 tablespoon tamari

Clean and cube potato(es) and boil until partly soft. Rinse nettles and cook in water until tender, then drain immediately. Sauté the onion and some garlic if you wish in half the oil until partly soft. Slice the shiitake and add to onion with the rest of oil and sauté for three minutes. Remove pan from heat and add potatoes and nettles. Put in crust. Combine milk, eggs, goat cheese and tamari and pour into pie crust. Bake at 350 F for 40-50 minutes, until center is set.

Adapted from Healing Wise by Susun S. Weed.

Have you tried this recipe? Tell us how it turned out!
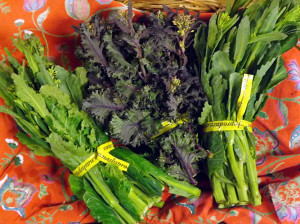
Raab and Carrot Salad

Raabs: green cabbage raab, Nash's red kale raab

Try different raabs, or a mixture of raabs, in this lovely salad, such as the sweet green cabbage raab (my favorite, at right) or Nash’s red kale raab (middle) to add vibrant color.

1 to 2 bunches raab (1 pound)
1 pound thin carrots
1 tablespoon sweet sherry or sweet vermouth
1 tablespoon cider vinegar or balsamic vinegar
1 1/2 tablespoon honey
1/2 teaspoon kosher salt
1/8 to 1/4 teaspoon ground hot pepper
2 tablespoons peanut or corn oil
1 tablespoon Asian (dark) sesame oil

Lightly steam the raab until barely tender. Remove from pan and allow to drain and cool. Steam carrots whole until they lose their raw crunch but are not cooked through. Let cool.

In a small dish, mix sherry, vinegar, honey, salt and hot pepper to taste, stirring to blend. Add peanut and sesame oils.

Line up the raab on a cutting board. Slice at a sharp angle to form long oblongs, 1/8 inch thick; add to dish. Cut carrots the same way and add to dish. Toss with dressing. Season to taste and chill.

Have you tried this recipe? Tell us how it turned out!
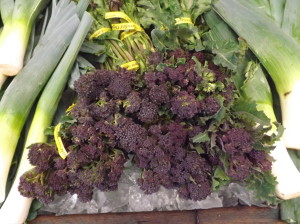
About Purple Sprouting Broccoli

purple sprouting broccoli

Try purple sprouting broccoli while it lasts!

An English heirloom, purple sprouting broccoli is bred for overwintering. It grows slowly throughout the winter and produces lots of purple heads in the spring, giving us the first delicious break from winter roots.

Purple-sprouting broccoli has been found to contain higher contents of antioxidant compounds compared with green broccoli, but tends to show higher sensitivity to cooking treatments. Nash’s purple broccoli is so tender (including the stems!), we recommend cutting it up in a salad for maximum flavor and nutrition.

That said, it is also super delicious roasted, as in this Roasted Purple Broccoli Parmesan recipe.

Have you tried this recipe? Tell us how it turned out!
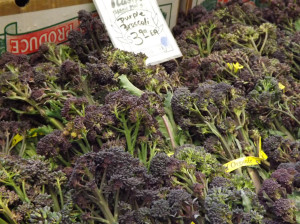
Roasted Purple Broccoli Parmesan

Purple broccoli, bunched, on display

Purple sprouting broccoli is a special type of broccoli that produces small, broccoli-like heads on long, sweet stems in the spring.

1 bunch purple sprouting broccoli, trimmed
2 tablespoon olive oil
3 tablespoons Parmesan or Pecorino Romano
1 clove garlic, minced
Salt and freshly ground pepper to taste

Preheat the oven to 400 F. Line a baking tray with parchment. In a shallow baking dish or bowl, combine the olive oil, Parmesan, garlic, salt and pepper. Stir to combine. Add the purple sprouting broccoli and toss to coat.

Place the broccoli in an even layer across the prepared baking tray. Roast in the oven until desired tenderness is reached, and until the edges are slightly crispy, about 10 to 15 minutes. Keep an eye on them, as they crisp up quickly.

Have you tried this recipe? Tell us how it turned out!
Six Tips for Cooking Dried Beans

Don’t shy away from any great legume just because it’s dried. Here are some preparation suggestions, thanks to The Kitchn.

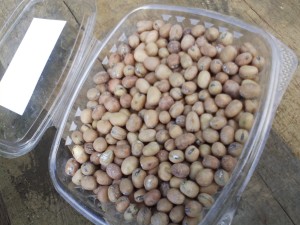
diana fava beans

Need some inspiration for your bean dishes? Try diana fava beans, the smaller and rounder sibling to the more typical lima bean-shaped windsor fava bean. They’re super tasty!

1. Use as little water as possible. Don’t let the beans get soggy or ultra-soft, because that dilutes their rich pot liquor, the incredibly flavorful liquid that comes off as they cook. Cook them slowly over low heat, only adding water if they start to dry up. Add enough water to just cover the beans, bring them to a boil, then reduce the heat and cook, uncovered, as low as you can.

2. Don’t mess with the beans. Some people add bacon, ham or garlic. However, well-grown heirloom beans have incredible ranges of flavor, nothing like canned beans. Try a couple pots of beans with just salt and pepper. You’ll be surprised at what you taste.

3. Don’t forget the salt! Beans need some salt. They have immense natural flavor, but they need some salt to bring it out, and they absorb quite a bit before it starts show through. Add a teaspoon of salt to the cooking water and more to taste in the last half hour of cooking.

4. Soak the beans. Rinsing dried beans then soaking them overnight in clean water will reduce the cooking time for most beans, although good fresh dried beans are less in need of a soak.

5. Cook dried beans for the right amount of time. Cooking time depends on the bean, but usually you’re looking at about 2-4 hours. Cover with water and simmer on an evening when you’re doing other things. Refrigerate and eat over the next several days.

6. Fresh beans need less cooking time. Freshly hulled beans will cook in about 45 minutes or less.

Have you tried this recipe? Tell us how it turned out!
No-Guilt Bean Dip

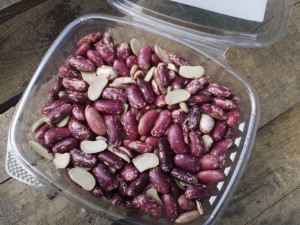
kidney beans

Nash’s grows kidney beans? That’s right! Get kidneys along with a variety of other legumes and grains at the store or our farmer’s markets.

Makes about 5 cups

1 teaspoon olive oil
1 onion, diced
3 cloves garlic, minced
1-2 cups cooked Nash’s dried corn, cooked until very soft
1 32-ounce can chopped tomatoes, drained and chopped
1 tablespoon chili powder
2 teaspoon cumin
1 teaspoon coriander
1 tablespoon brown sugar
1-3 tablespoons salt (to taste)
6 cups cooked kidney beans, cooked until mushy

In a large Dutch oven or sauce pan, heat oil on medium heat. Add onions and cook until softened and just turning golden. Add garlic and cook until fragrant. Add corn and tomatoes and cook until excess liquid from tomatoes has simmered away. Stir in spices, brown sugar, and one tablespoon salt.

Stir in beans, using the bowl of your spoon to smash the beans against the bottom and sides of the pan. Continue stirring and smashing until the beans are as mashed as you like. Leave some of the beans still whole for the texture if you like. Taste and add salt and other seasonings as needed. Serve with thinly sliced pieces of toast, vegetable sticks, pita chips, or tortilla chips.

We thank The Kitchn for this great recipe.

Have you tried this recipe? Tell us how it turned out!
About Cabbage Raab

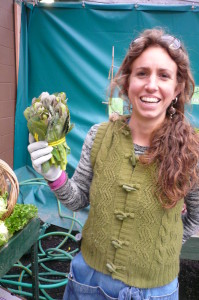
Eliza with green cabbage raab

We get pretty excited about raabs, especially cabbage raab, at this time of year.

In the spring, we are all getting just a little tired of root vegetables, even if they are delicious. Just in time, the brassicae send up their flowering heads and they are sweet and oh, so tender. We call these shoots “raab,” not to be confused with broccoli rabe, which is actually a variety of broccoli in and of itself.

One of the sweeter raabs that we have at Nash’s is from green cabbage. Other raabs come from various kales, Brussels sprouts, arugula, mizuna and collards. But the cabbage raab seems to put all its natural sugars into its growth in the spring.

Brassicae raabs are thought to detoxify carcinogens and are useful in many forms. Almost all parts (stems, roots, flowers, leaves and seeds) can be used as food. They are crunchy and much sweeter than you would imagine.

Have you tried this recipe? Tell us how it turned out!
Pork and Cabbage Raab Stirfry

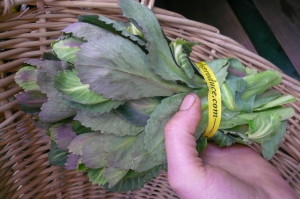
green cabbage raab

Cabbage raab is as beautiful to the eye as it is to the taste.

Several slices bacon or pork belly
4 cloves garlic, chopped
2 bunches cabbage raab (or other raab), bottom ends trimmed
Dash olive oil
Salt and pepper to taste
Cayenne to taste (optional)
Brown rice or cooked whole grains

Cut several slices of bacon or pork belly into small pieces and sauté with garlic in a frying pan until the bacon starts to brown. Remove and set aside.

Wash raab and trim off the bottom ends. Cut the rest—stalk, leaves, florets and all—into 1-inch pieces. Add a little olive oil to the pork drippings and sauté the raab until it starts to wilt. Cover and let it cook for a few minutes more until tender.

Remove from heat and stir in pork and garlic. Add salt and pepper to taste, and a little cayenne if you like a bit of a kick. This tastes great on a bed of brown rice, or on cooked whole grain, like triticale or rye berries.

Have you tried this recipe? Tell us how it turned out!

Sauteed Cabbage Raab

green cabbage raab

Use either green cabbage raab or red cabbage raab for this tasty seasonal dish.

3-4 slices bacon or pork belly, cut into small pieces
4 cloves garlic, chopped
2 bunches cabbage raab, washed and ends trimmed
1 tablespoon olive oil
1/8 teaspoon cayenne (optional)

Saute bacon or pork belly with garlic in a frying pan until the bacon starts to brown. Remove and set aside.

Cut raab (stalk, leaves, florets and all) into one-inch pieces. Add olive oil to the pork drippings and saute raab until it starts to wilt. Cover and let it cook for a few minutes more until tender.

Remove from heat and stir in pork and garlic. Add salt and pepper to taste and a little cayenne if you like a bit of a kick. This tastes great on a bed of brown rice or on cooked whole grain, like triticale or rye berries.

Have you tried this recipe? Tell us how it turned out!